
Use this guide to send forms to a Patient or complete them in the besa EHR. Before you finish, check that the completed form is saved in the correct Patient record.
📚 Resources Needed
besa EHR
The Patient record and the Provider’s instructions
A current Patient email address if you are sending a form
✅ Before You Start
Confirm the Patient’s name and date of birth.
Check whether the form has already been sent or completed.
🚀 Tips & Tricks
Send forms emails the Patient a form to complete. Complete forms lets you fill it out in clinic.
Start from the encounter when the form belongs to that visit. This also links the document to the encounter.
⚠️ Selecting a form under Send forms sends the email right away. Check the email address first.
📘 Instructions
1. Open The Forms Menu
From the Patient detail page, click the three dots next to Summary.
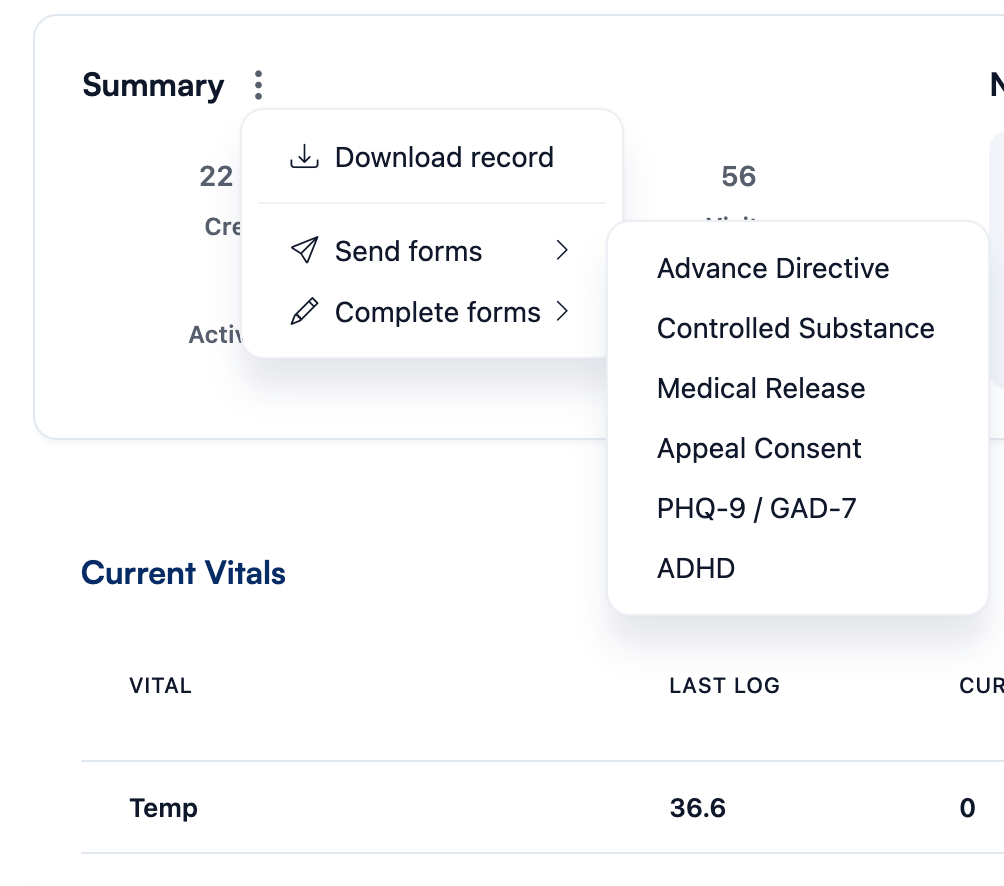
Patient menu — supplied design reference.
Or, from the encounter, click Add Items at the bottom.
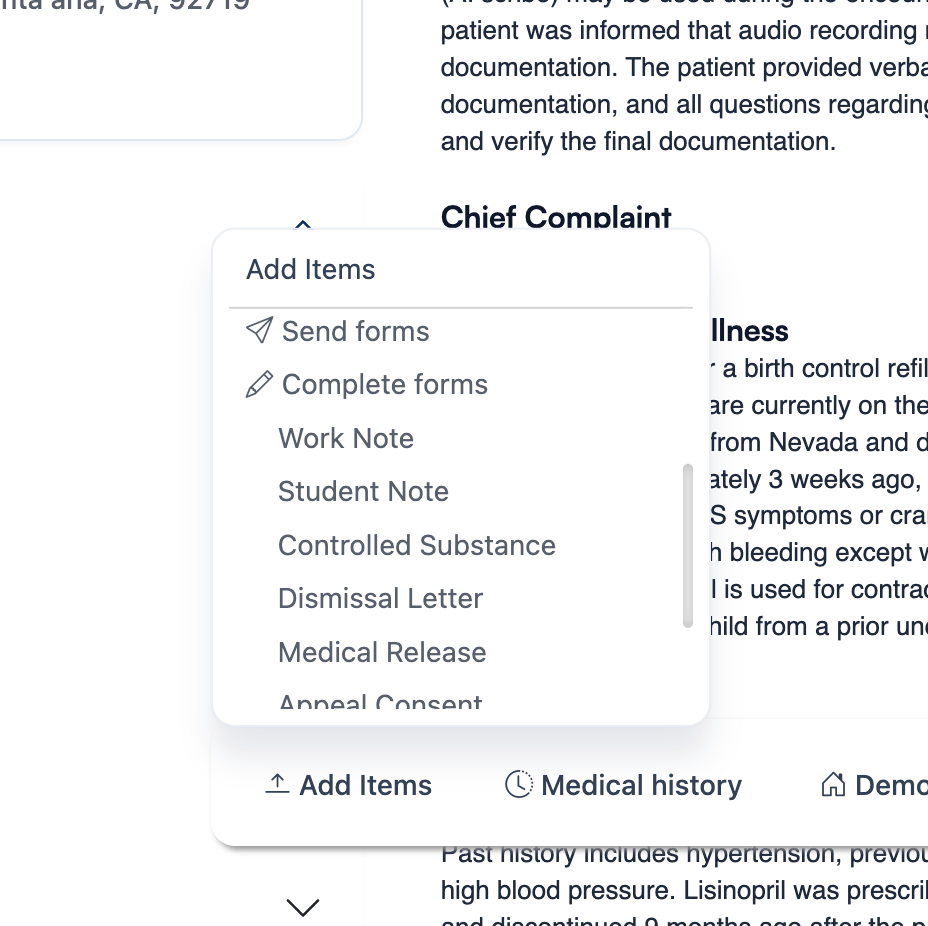
Encounter — Add Items panel.
2. Choose The Form
Choose the form requested by the Provider. Some forms appear in both menus.
Send forms
Advance Directive • Controlled Substance Agreement • Medical Records Release • Appeal Consent • PHQ-9 / GAD-7 • ADHD (ASRS-v1.1)
Complete forms
Work Note • Student Note • Controlled Substance Agreement • Dismissal Letter • Medical Records Release • Appeal Consent • Treatment Refusal • Concussion (ACE)
3. Send Or Complete The Form
If You Are Sending It
Confirm the Patient’s email, then select the form under Send forms.
The Patient opens the email link, confirms their last name and date of birth, and completes the form.
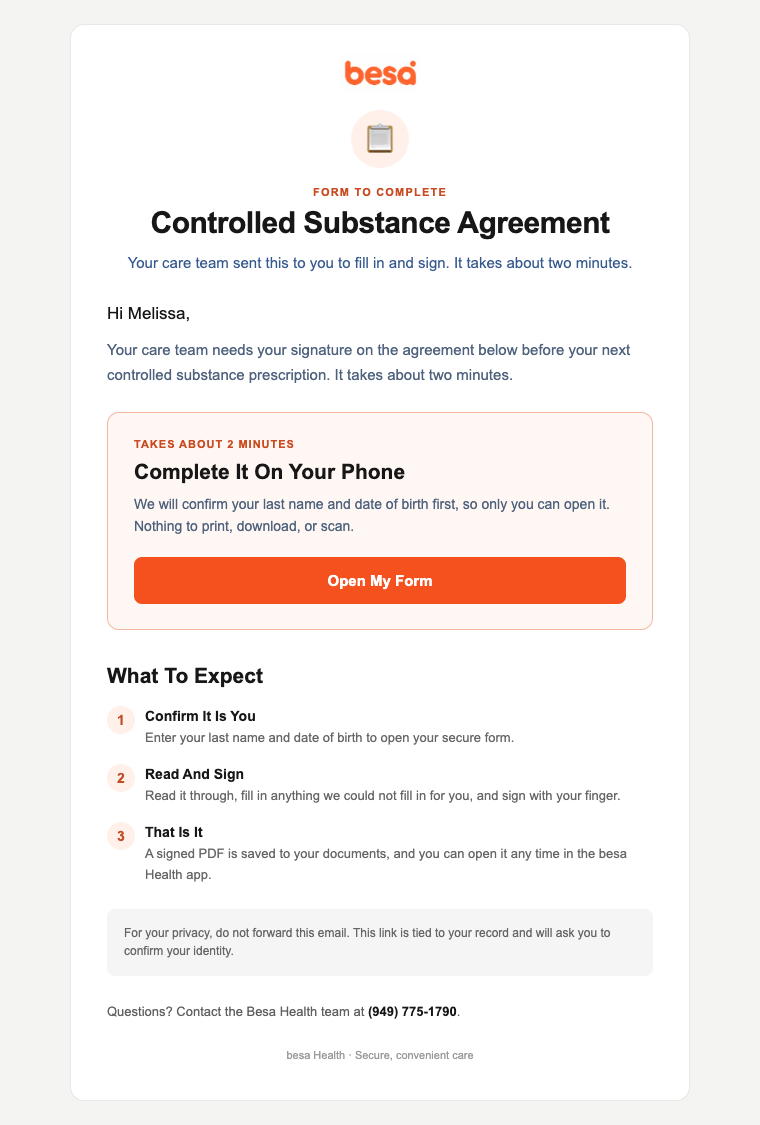
Example of the email the Patient receives.
Advance Directive is different: the email provides a blank form. The Patient follows its paper-completion and signing instructions, then returns a copy.
If You Are Completing It In Clinic
Select the form under Complete forms. Review the prefilled details and enter the requested information.
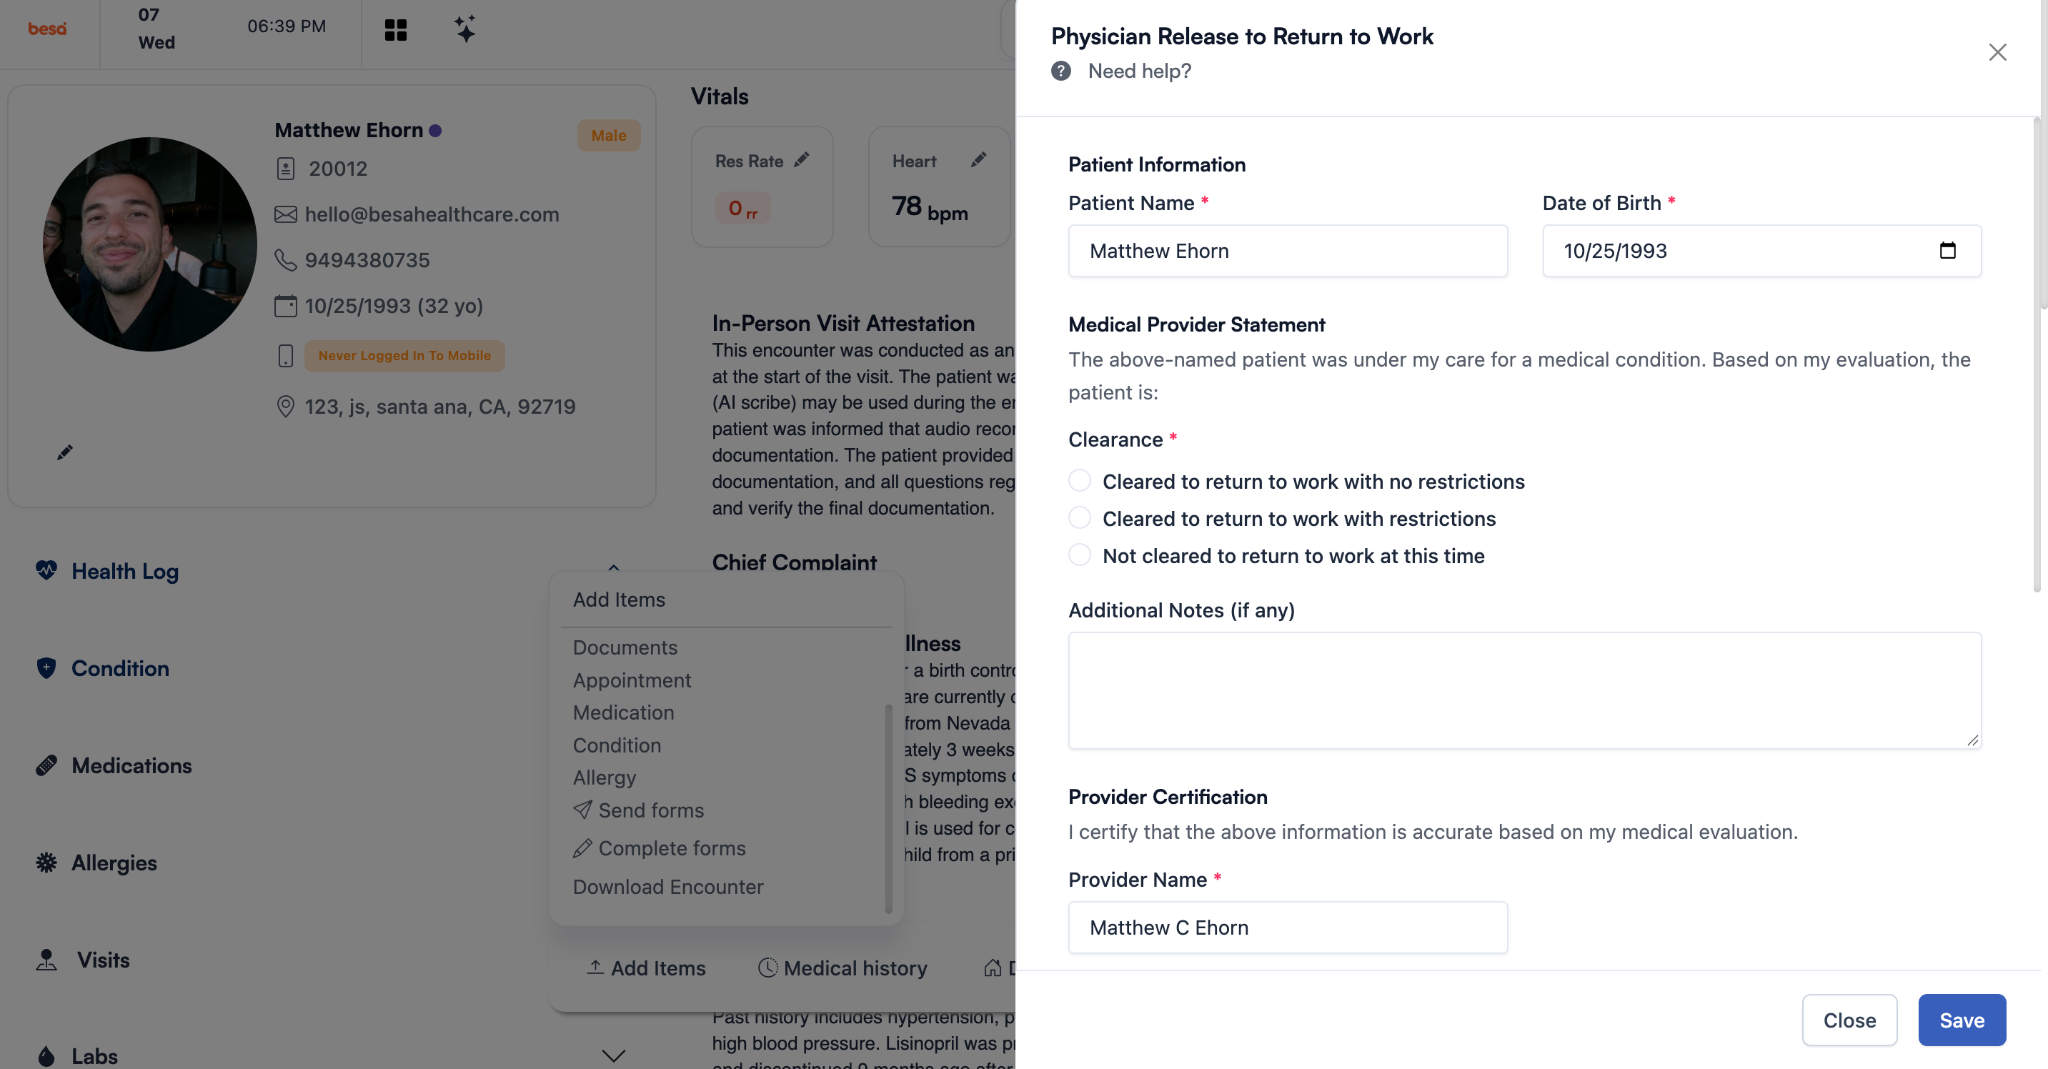
The Patient will receive the form in the documents section of the Patient app
Review the dates, answers, and signatures, then save the form.
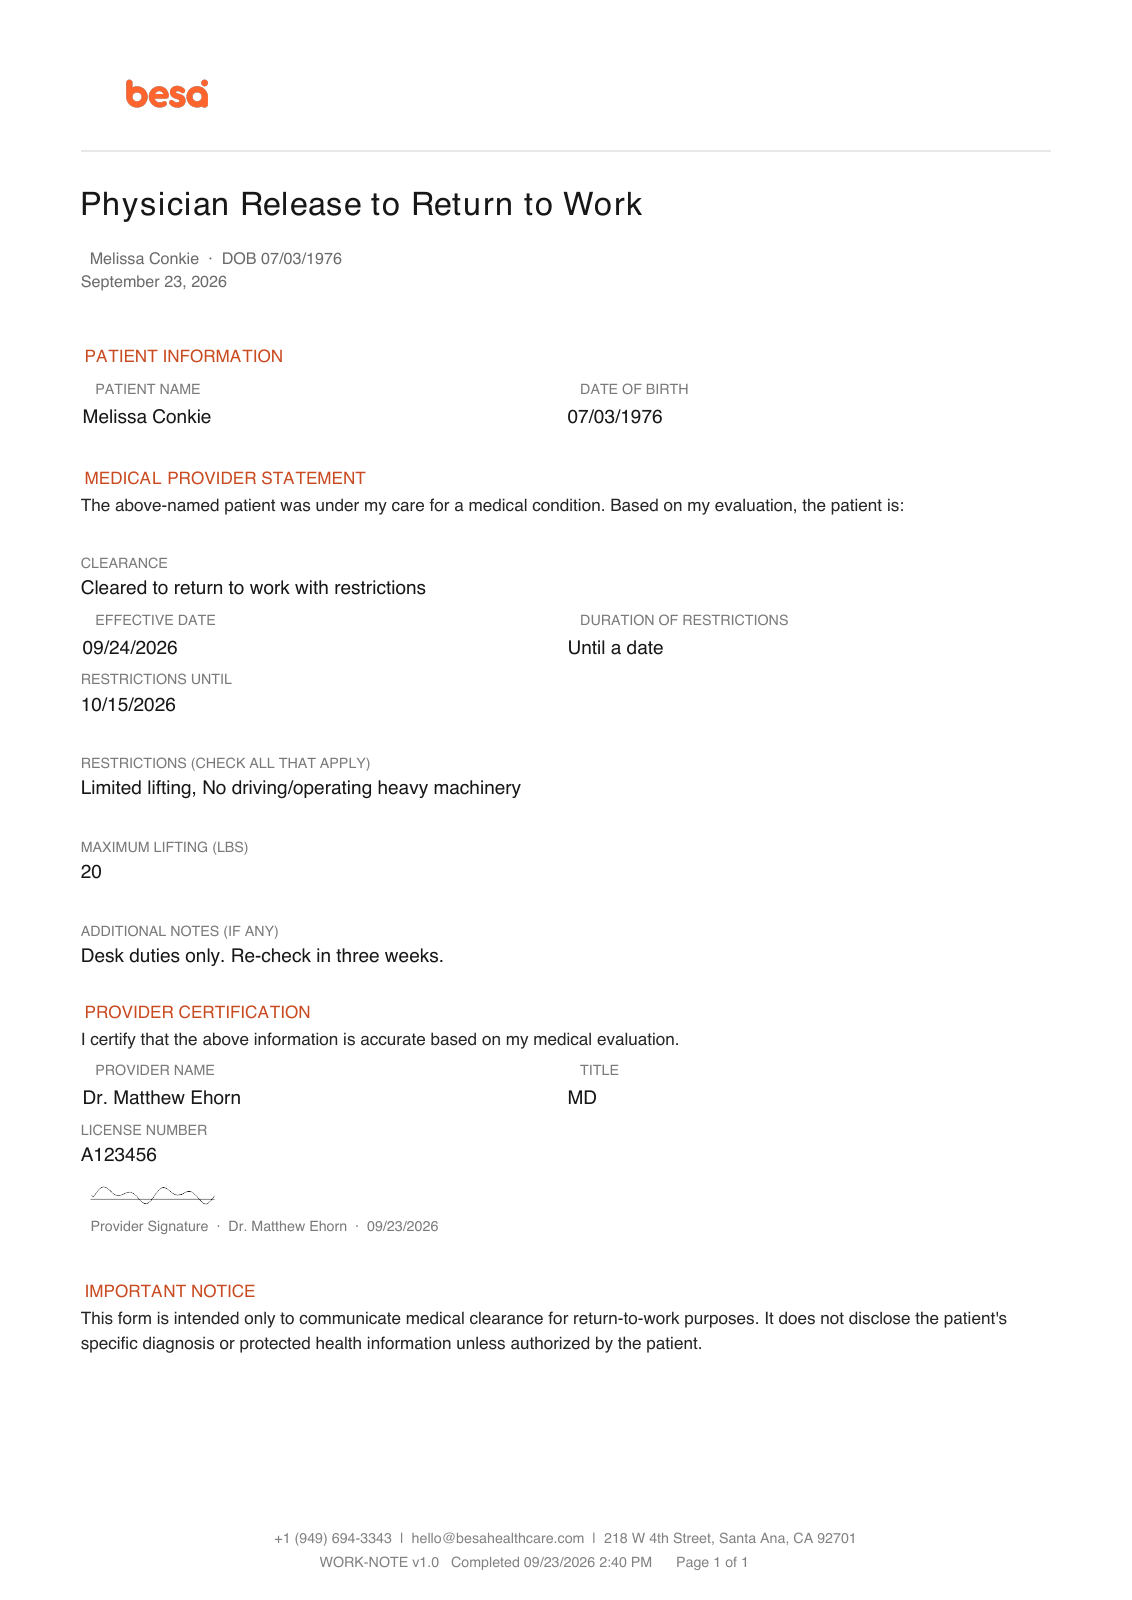
Work Note example — sample answers only.
⚠️ For Treatment Refusal, the Provider enters the recommended care and risks. Complete the Patient signature or refusal-to-sign section, including a witness when needed.
4. Check The Result
Open Documents in the Patient record. Confirm that the completed PDF is there and opens correctly.
If you started from an encounter, confirm that the document is also linked to that visit.
For PHQ-9 / GAD-7 and ADHD, check the screening results and arrange Provider review.
Comments (0)