
There are several times throughout the day where you will need to scan in documents. Typically we will always need to scan in the documents and add it to the Patient encounter. Look below at how to do this while being on a laptop and remote system.
📚 Resources Needed
- besa Health EHR
- Scanner - Brother (Labeled printer)
- Laptop
- Paper needed to scan
🚀 Tips & Tricks
- Upload the document directly into the Patient encounter. This adds to the documents for the Patient and in the encounter.
- Make sure you select the scanner named Printer in our office computer
- Once scanned, put the paper in the manila shred folder on the side of the desk.
📘 Instructions
Be sure to follow the steps listed below.
-
Load Paper Needing to Scan
- Load the paper that you need to scan in the big printer.
- Make sure to put it face up in the document feeder
-
Open Scanner and Scan the File
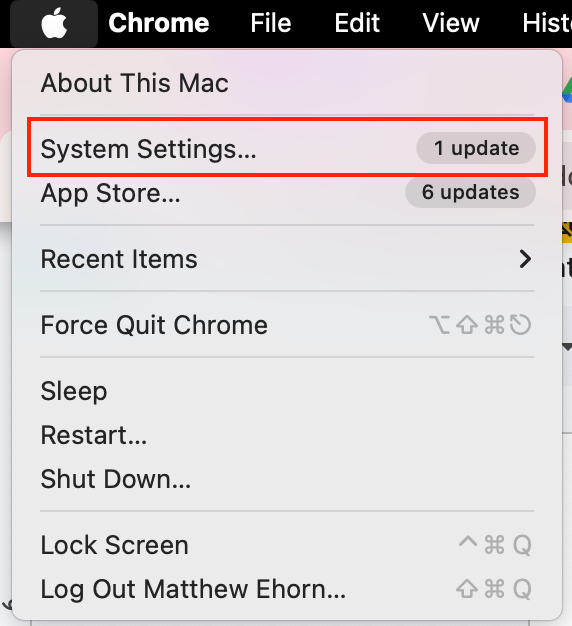
- Click on apple icon in top left corner > System settings
- Scroll down until you get to Printers & Scanners
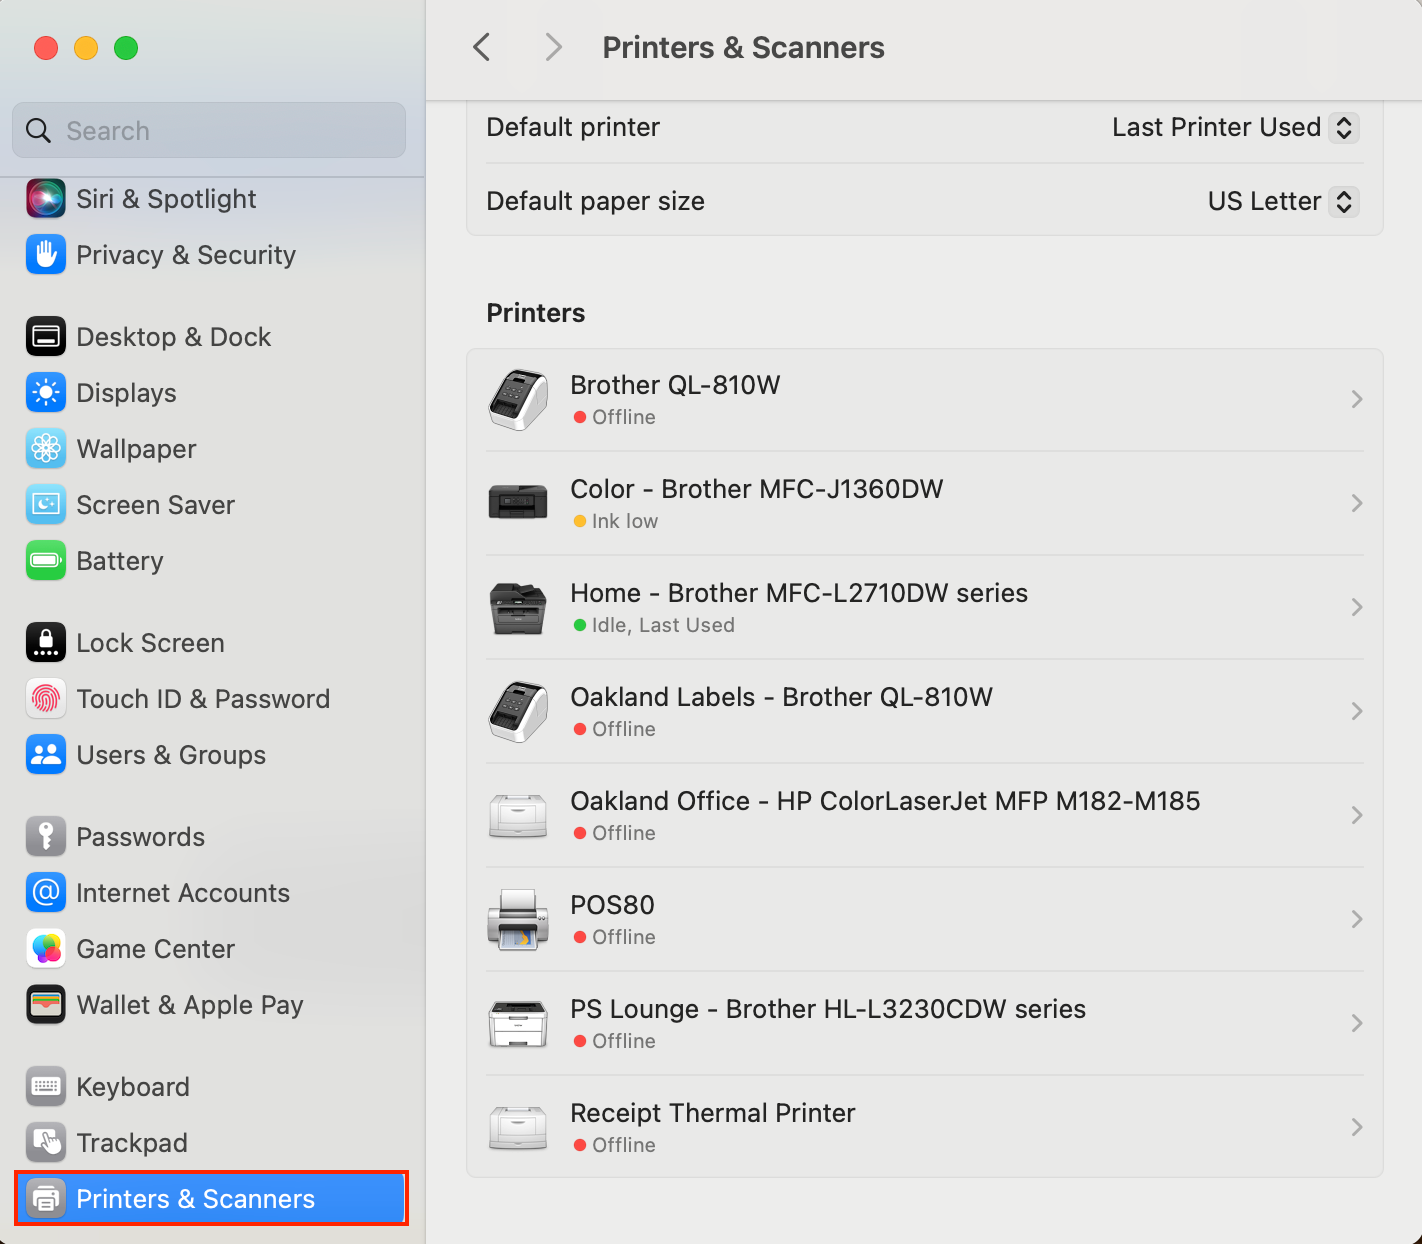
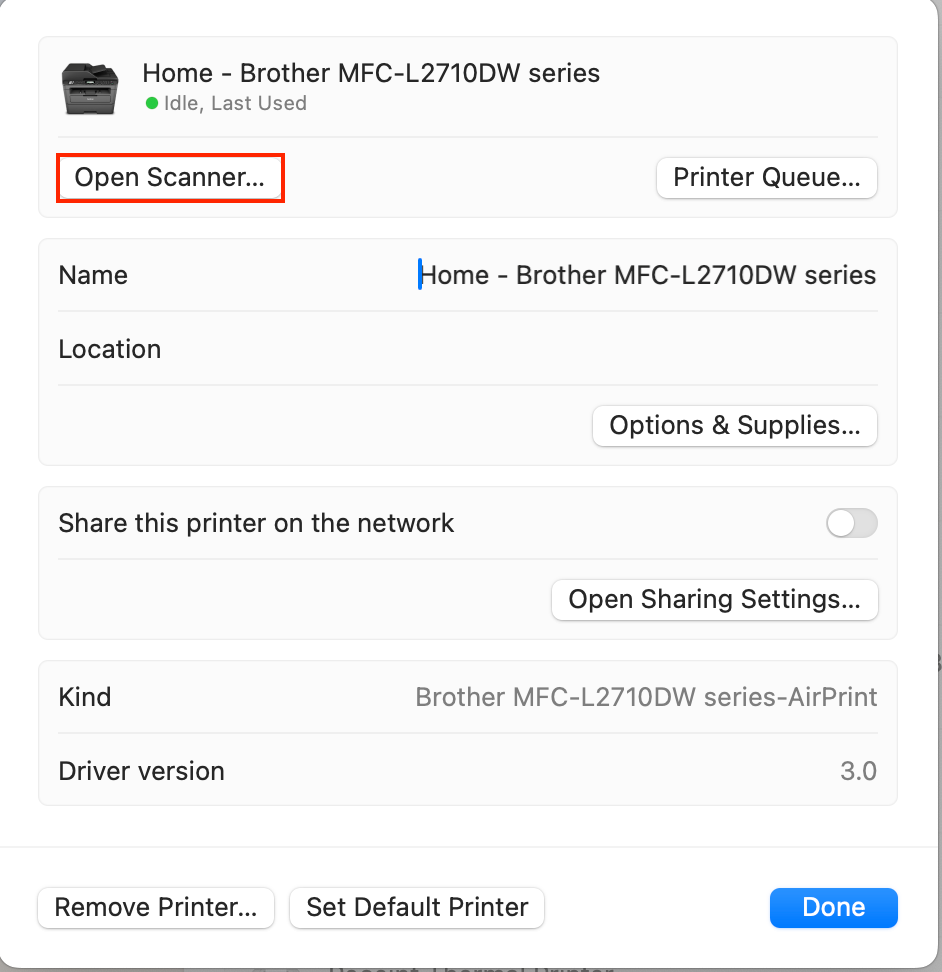
- Select the printer scanner you have labeled Printer
- When there, select Open Scanner
- Make sure the following is true:
- Document feeder
- Name the document
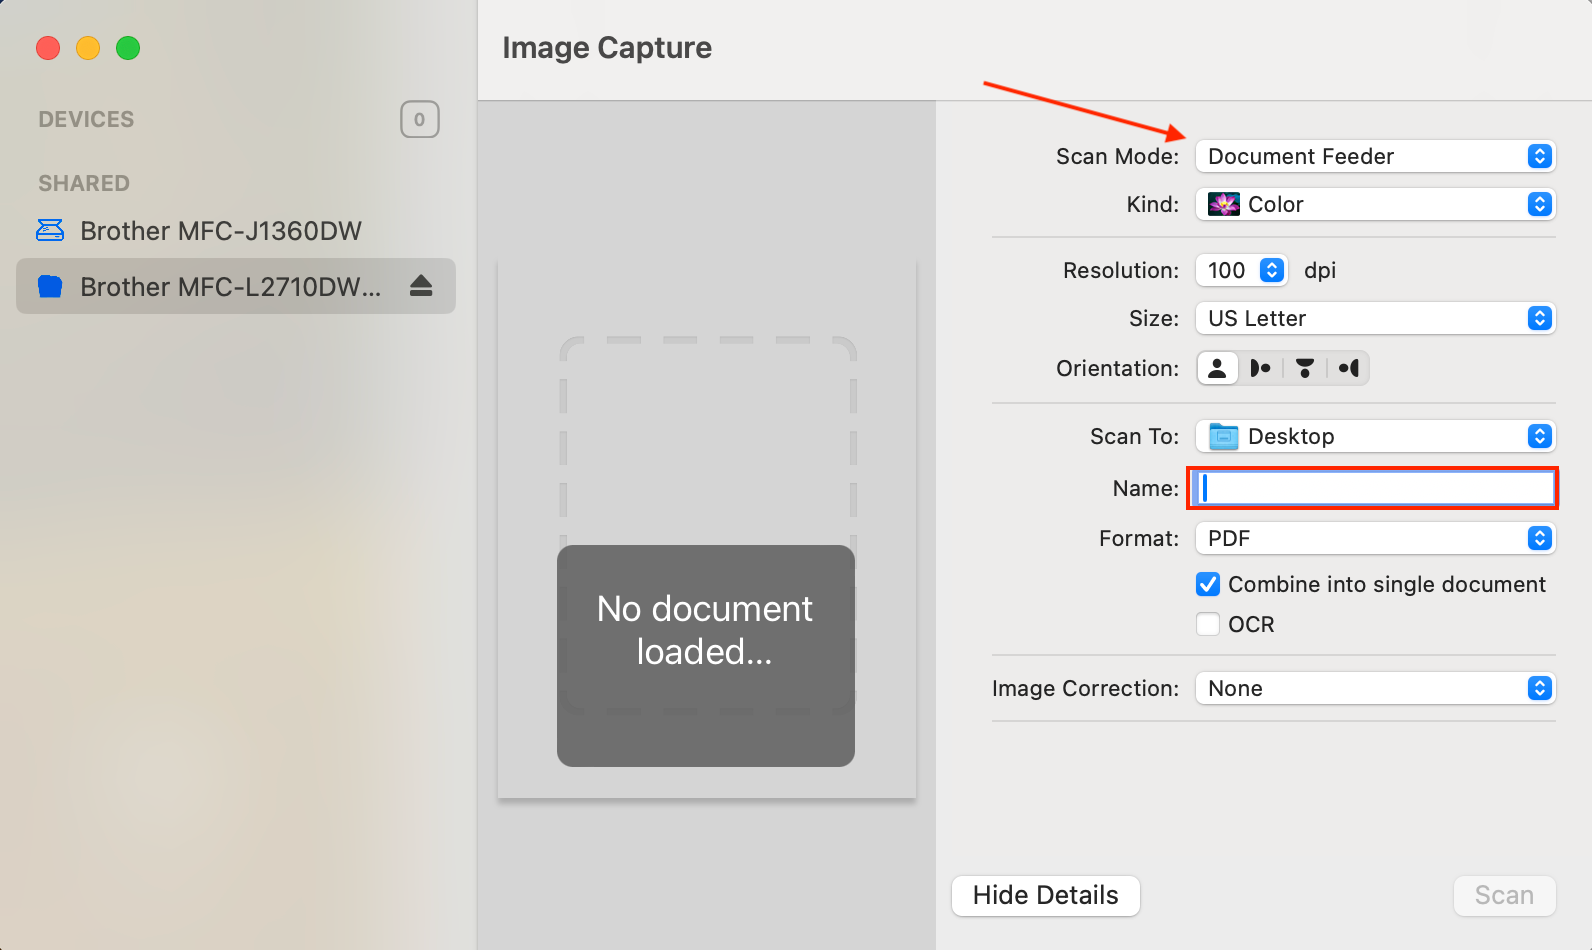
- Press Scan
- It will then save to the computer. Here in this example it is saving to desktop
- Click on apple icon in top left corner > System settings
Upload to Patient Encounter
- Go in the EHR.
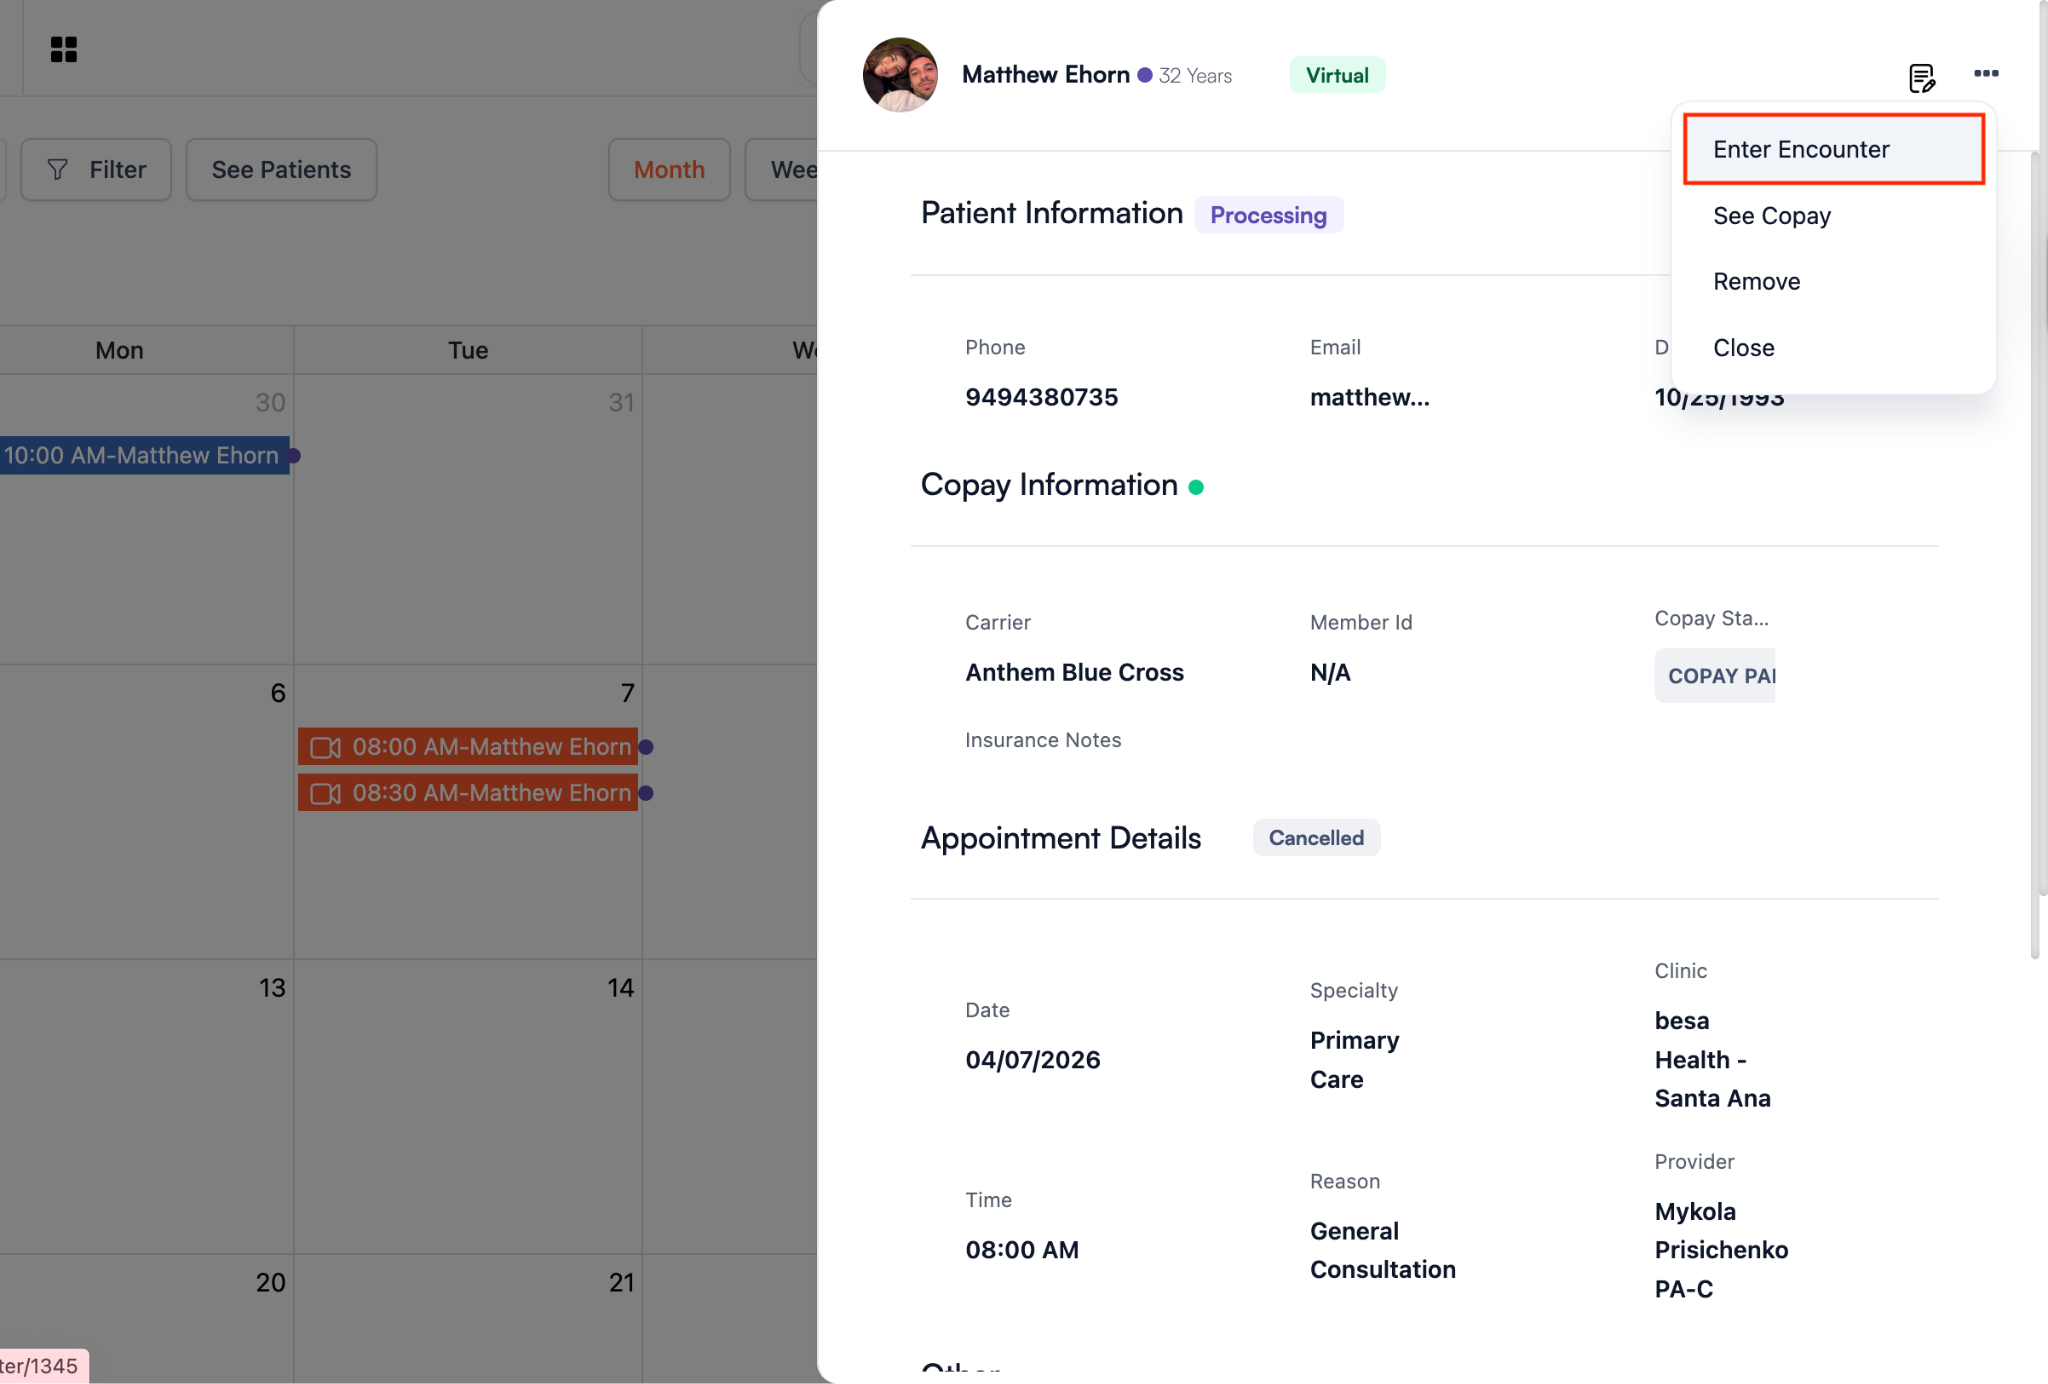
- Open the Patient encounter. The fastest way to do this would be to go to the appointment page > Click on visit card > Click action icon > Enter Encounter.
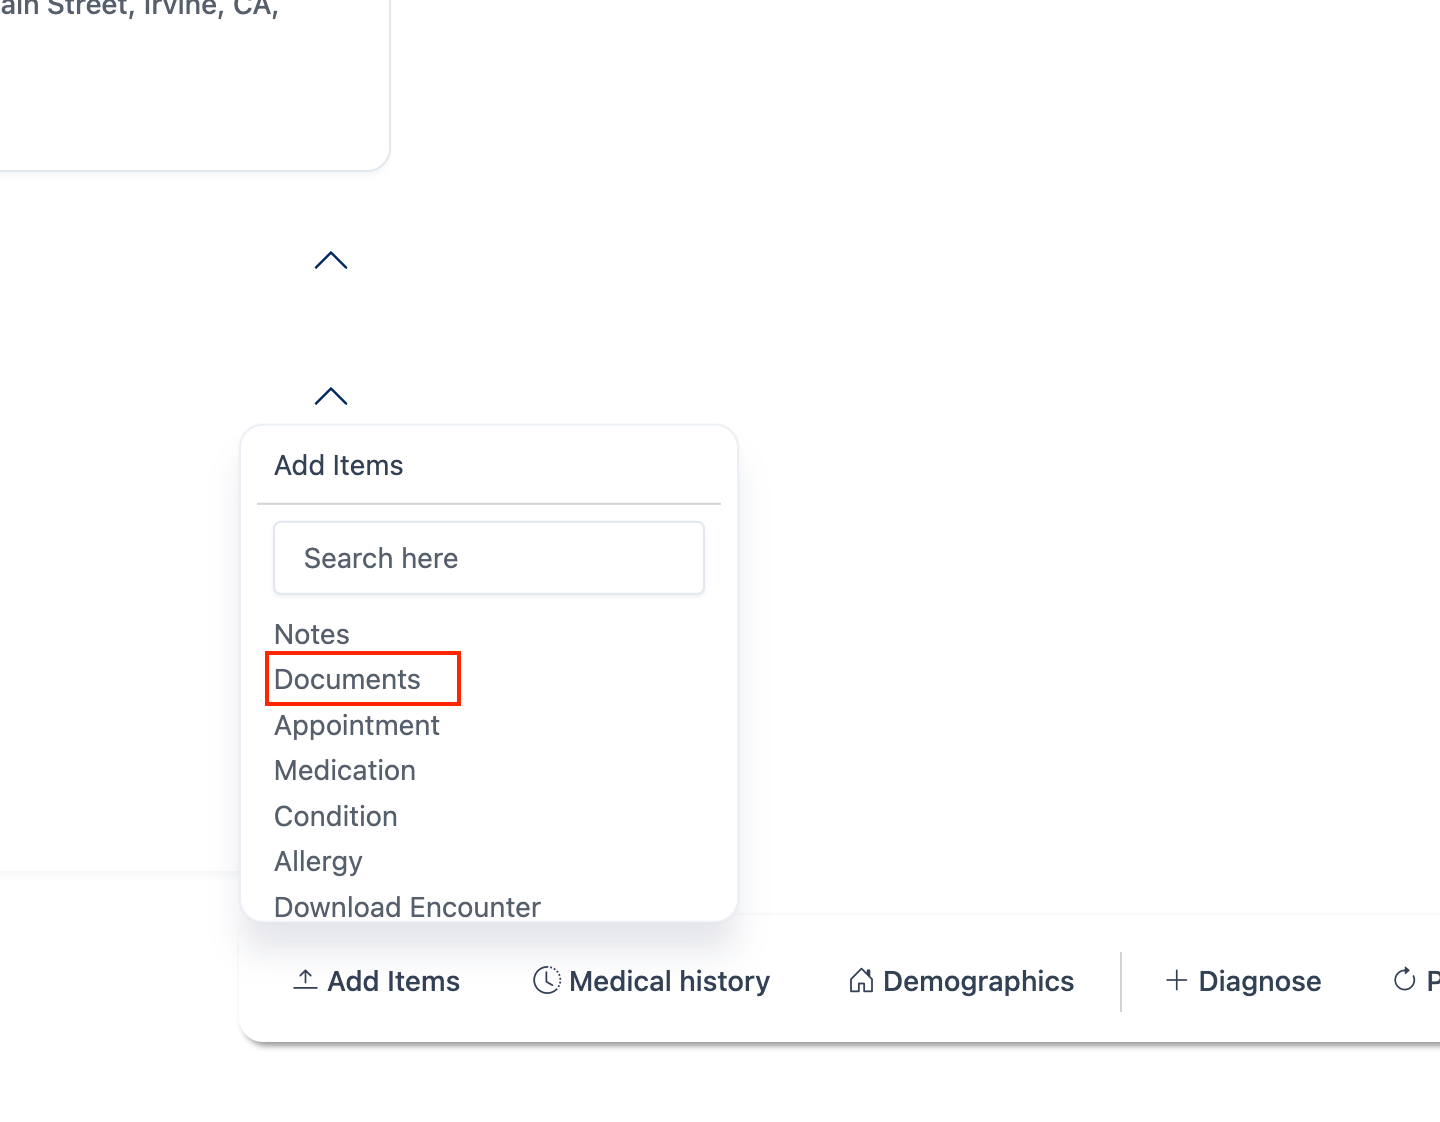
- When you’re in, click + Add New > Documents
- Make sure to title the document with what the document is, along with the date.
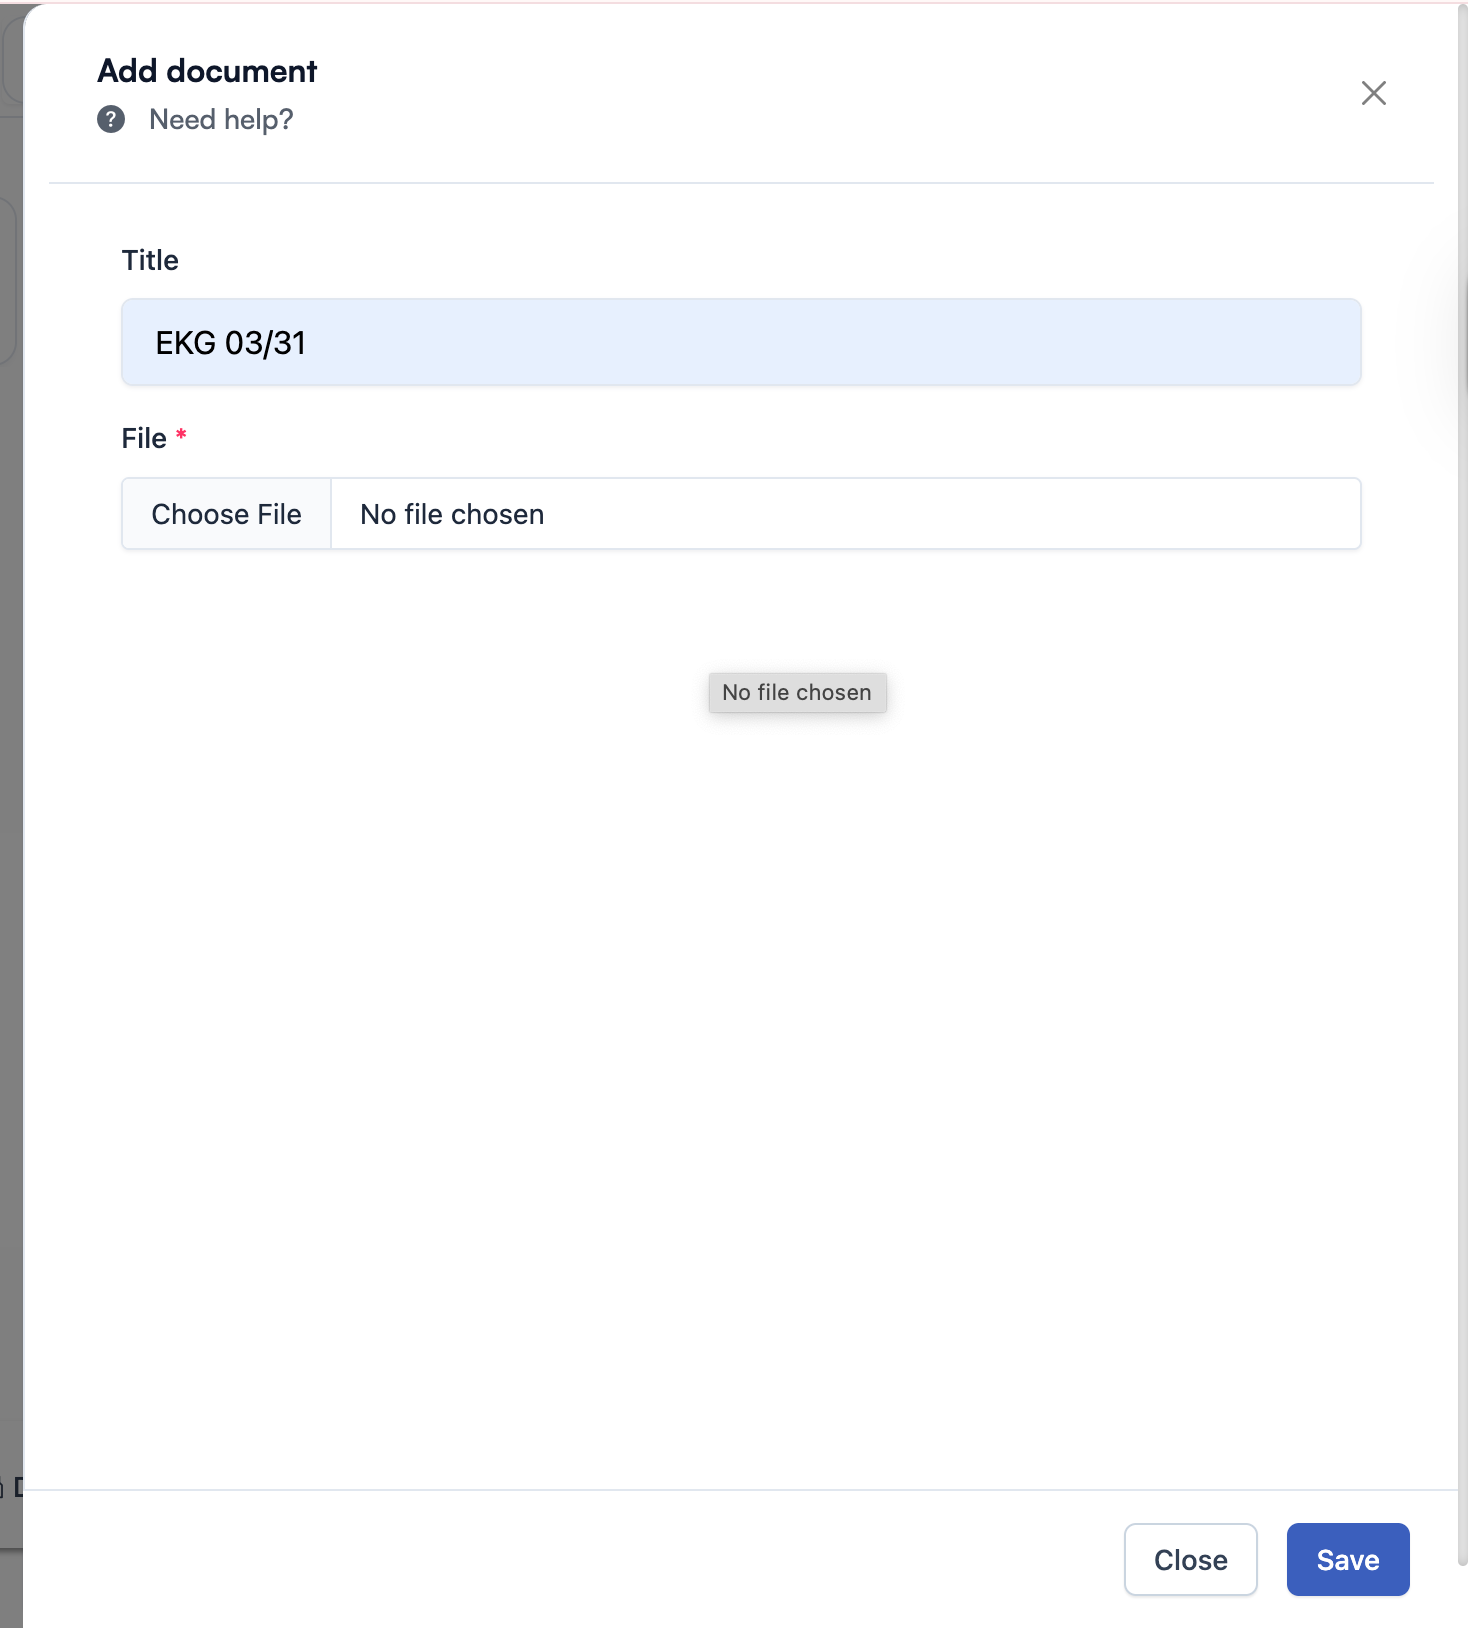
- Add the file
-
SAVE! And you’re done.
📹 Video Explainer
Scanning a file and adding to encounter.mp4
Comments (0)